Product Managemnet
- How to Add and Manage Products?
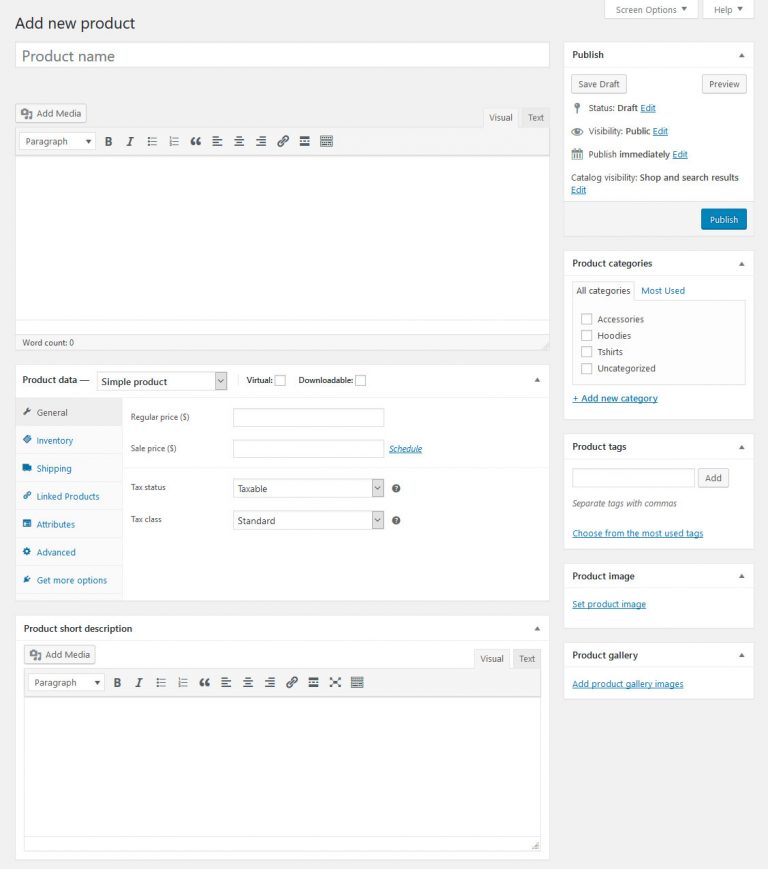
You create items to sell via Products > Add New. Clicking on it takes you to this familiar screen

At the top of the screen, you can give your product a title and description. This works the same way as creating a post or page, including that you can use the formatting options and add images and other media. All of this will appear on the main product page.
There are also a few other options that are very similar to what you find for posts and pages:
- Product categories – Gives you the option to divide your products into categories and subcategories and aides customers to find what they are looking for.
- Product tags – In addition to categories, you are able to create tags customers can use to find products.
- Product image – This works the same as a featured image and will appear both at the top of the product page and in the shop.
- Product gallery – In addition to that, you can also add an image gallery. This might be to show different product variations, images from other angles, and more.
If you have ever worked with WordPress before, all of this should pose no challenge to you. However, there are a few additional settings.
2. Configure Product Data
You find the product data below the main editor window. Filling in this information is mandatory for your shop to work.
The first choice you need to make is for the type of product you are selling:
- Simple product – Your run-of-the-mill physical product like a book.
- Grouped product – A collection of several simple products customers can buy individually or together, like a number of DVDs that can also be purchased as a set.
- External/Affiliate product – Items that you don’t possess or own but that clients purchase from someone else where you get a cut of the sale.
- Variable product – A good example of a variable product is a t-shirt that comes in several sizes and colors (i.e. variations).
This happens via a drop-down menu at the top. Depending on your choice, you will have different configuration options below.
- Virtual – Check this box if you are not selling a physical product but some sort of software. Doing so will also remove the shipping options.
- Downloadable– This is the option for downloadable products. Checking it allows you to upload a file and add download conditions.
- General – Determine the price and sales price (if applicable) as well as the date range for any upcoming sales. In the general settings, you can also provide product URLs and a button text for affiliate products. Plus, you may set up whether it’s a taxed product as well as its tax class, if configured
- Inventory – Assign a Stock Keeping Unit (a unique ID, mandatory), determine whether the product is in stock and the quantity available (if applicable). Allow backorders yes or no and whether customers can buy more than one of these products at a time.
- Shipping – Product weight, dimensions, and shipping classes.
- Linked Products – Include related products to display as upsells or cross-sells and create product groups.
- Attributes – Allows you to define custom product attributes like color, size, etc.
- Variations – With existing attributes, here’s where you create variations of your products.
- Advanced – Add a custom purchase note to send to customers after a purchase, change the product order inside the menu, and determine whether to allow reviews.
In addition, anything entered under Product short description will show up under the product title.
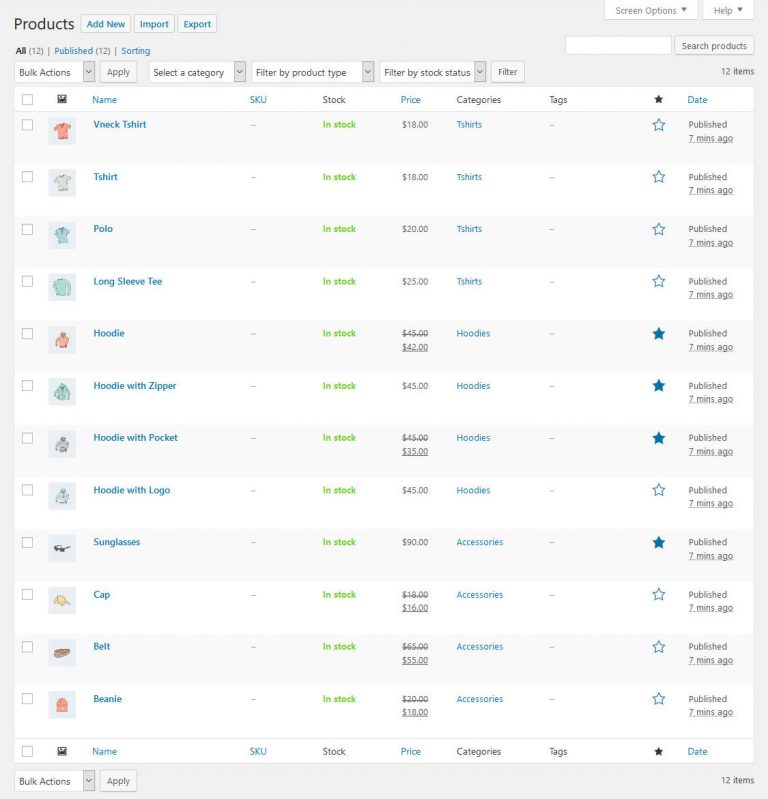
Once you are done and have saved, you can find your new product in the list under All Products.

3. Other Product Settings
There are a few more items under Products that are pretty easy to understand.
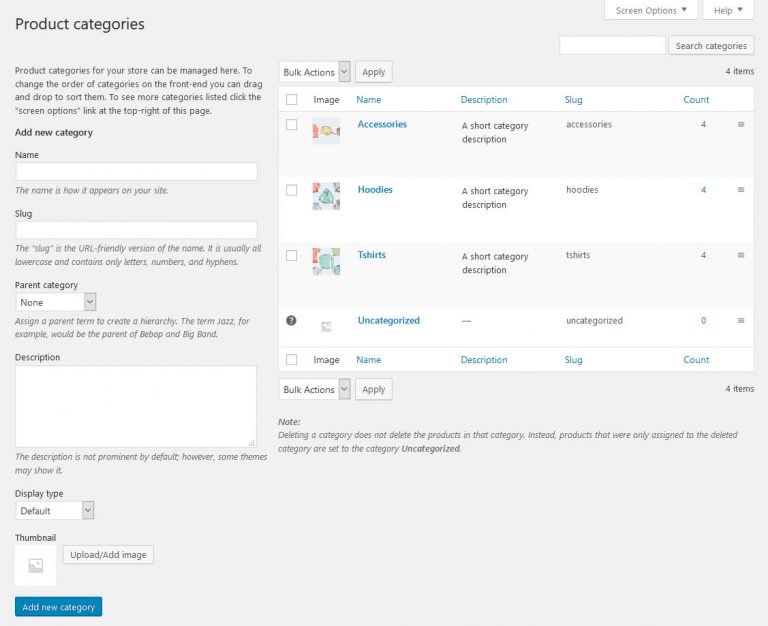
Categories and tags should be clear. Note that in WooCommerce you can add thumbnail images to product categories.

Shipping Classes allows you to create product groups by shipping and can be used for calculating shipping costs by class.
In Attributes, you may create sizes, colors, and other characteristics and apply them to products to create variations.
